You are here: Experiment Guide > MIRO > Operation > Capturing AFM Images

Capturing AFM Images

There are two ways to capture AFM images. If the MIRO canvas is active, the AFM images will be captured into MIRO. If another scan view in NanoScope is active, the AFM image will not be automatically imported into MIRO but will be saved into the capture directory.

This procedure assumes that you have already gone through the Calibration and Registration procedures.

To capture an AFM Image into MIRO:

  1. After setting up the Dimension Icon for the imaging mode you will use, Engage the tip and adjust the Scan Parameters in the NanoScope window.
  1. Click the MIRO icon. As the system scans, the current realtime scan area is overlaid onto the MIRO canvas.
NOTE: It's not uncommon for the registration to be off by ~5 μm. After engaging, you can fine-tune the registration by moving the AFM image to more accurately overlay the feature (see Adjusting the Image for details).

  1. Click the Capture AFM image icon.
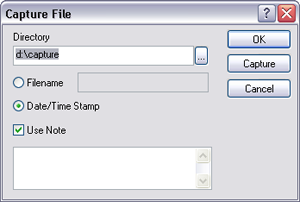
NOTE: If you have the Date/Time Filename button selected, a window will appear warning you NOT to use a Date/Time file name.
NOTE: Use the MIRO Capture button to put the image on the MIRO canvas. If MIRO is not active, the image will not be loaded onto the canvas.
 
  1. Click OK to open the Capture File window:

 
  1. Click the Filename radio button and enter the captured Directory and Filename. The AFM scan will then be captured.


www.bruker.com Bruker Corporation
www.brukerafmprobes.com 112 Robin Hill Rd.
nanoscaleworld.bruker-axs.com/nanoscaleworld/ Santa Barbara, CA 93117
   
  Customer Support: (800) 873-9750
  Copyright 2010, 2011. All Rights Reserved.